Tuesday 15 December 2015

Kaleidoscope Blog Hop

Welcome to our blog hop, today we are sharing projects made with the Kaleidoscope Paper Pack X7202B and accessories X7202C. If you have arrived here from Vandra's blog  you are in the right place if you arrived here by chance I hope you enjoy the hop. These papers and accessories are so pretty and colourful and can be used for all sorts of projects. 


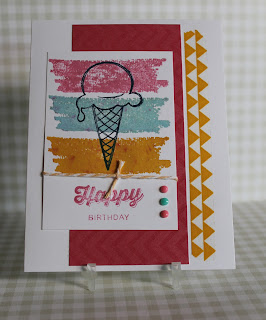
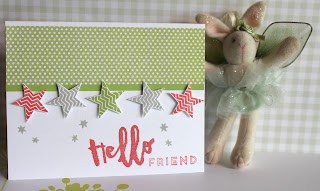
 I have made some cards which really showcases the papers, I decided to use more than one of the papers in all three cards. I used the December stamp of the month S1215 and the Shin Han markers for this card. 


I used  the Quatrefoil Embossing folder Z1926 and Green Shimmer Trim to embellish this card. The Flower in the centre of the card is one of the clear stickers from the Accessory pack which I adhered to white Daisy cardstock and then cut out. I used the foam tape to lift the flower off the card.


For this last card I used one of the Botanical Background stamps D1645 and then coloured it with the Shin Han markers. A little bit of bling and a sentiment finishes off this card.


Click here to go to Wendy's blog, and see what great project she has created. We all enjoy your comments so please leave a comment before you continue on.

Thursday 26 November 2015

New Cards

Hello, I'm sorry but I have been neglecting my blog again. Here a few of my recent cards, which I really enjoyed making. These have all been added as samples for my card buffets. I try to have a variety of styles so my customers have a good choice of cards to make.


Tuesday 10 November 2015

"Urban" Blog Hop

Welcome to our blog hop, where we are showcasing the Urban Paper Pack, if you have arrived here from Maz Wood's blog  you are in the right place if you arrived here by chance I hope you enjoy the hop. The Urban papers are very versatile, the colours are quite masculine but these papers can be used for all sorts of layouts.


I have created an Easter layout, quite often Easter layouts are done using pastel colours mostly because in the Northern hemisphere it is spring at Easter but I thought the Urban paper pack would work really well.  I used layout 7 from Make It From Your Heart Volume One as my inspiration for this layout. The Easter bunny and flower stamp sadly are no longer available, the Artbooking Cricut cartridge was used to cut Happy Easter and the book page. The stamp set that comes with the Artbooking Cricut cartridge has the lined page stamp as well. I used the Shin Han markers to colour the flowers and the Easter bunny. There is always an egg hunt for the kids at our family Easter get together and getting a good photo of all the kids with their Easter baskets is always a challenge.


To continue the hop click here to go to Mez's Craft Room to see how she has used this great paper pack, I am sure you are getting lots wonderful ideas. We all love receiving your comments so please leave a comment.

Monday 9 November 2015

Card Buffet

Sorry that I have been missing for a while, but it has been quite busy at work and I have had to work extra hours, plus I went away for a week during October consequently my blog has suffered.

Have you heard of a card buffet? What is a card buffet I hear you ask, it is a workshop where you have the opportunity to feast on an array of cards that you can create. For this workshop I have baskets with kits all prepared for you to make up to 6 different cards all you need to do is stamp the images and then put the card together. I love giving and receiving hand made cards. Here are a few samples from this month's Christmas Card Buffet. If you are interested in coming along to one of these workshops please let me know.


Thursday 1 October 2015

October Stamp of the Month Blog Hop

Hello and welcome to this month's Blog Hop. If you arrived here from Britt's blog you are in the right place, if you happened upon this hop by accident no worries just continue on by following the link at the end of the post.

October's stamp of the month is Twinkle S1510 and what a great stamp it is. I love everything about Christmas and this stamp set is no exception. It will make terrific cards and all sorts of crafty creations.


One of the many things I really like about our "Acrylix" Stamps is how easy it is to manipulate them. With this card I shaped the light strand into a gentle wave on my block and then stamped the image, rather than having a straight line. I stamped the light bulbs and fussy cut them and adhered them with foam tape, I liked this look better than stamping them directly onto the paper. Adding the little stars made it appear as if  the lights were twinkling. To finish off I used the Merry Everything stamp with the label stamp which I also fussy cut and adhered with foam tape. I sometimes think less is more and I felt that way with this card. 


I enjoy decorating bags for gifts rather than wrapping them, so for my last project that is what I did. You can buy small brown paper bags in shops like Red Dot or the Reject Shop and they are quite inexpensive. I stamped 7 of the ornaments, which I trimmed slightly then added the stars which I stamped in Honey ink adding the stamped Christmas Love image on top to created the flower shape. The white cricut cut out is from the Art Philosophy cartridge which can be found on page 66, it was cut at 4". For the bow I used Striped Twill Ribbon Z1987.


One of the other things I like about our stamps is how you can mix the stamp sets with other sets. In this card I also used the stamp set Make it Merry D1617 which you can find in the Holiday Expressions Catalogue. I also used the star and heart from the Zoe Workshop on the Go Kit G1096. I first stamped the scooter in black then I stamped it again in Cranberry and cut out bits and adhered them with the foam tape. The Christmas tree was stamped using Topiary ink and the ribbon was coloured with a ShinHan Marker. For the greeting I cut a 2" white circle and a 2 1/4" scalloped circle in cranberry cardstock using the Art Philosophy Cricut cartridge. The stars were stamped using Honey ink and Joy in Cranberry ink. I added a little bling to the card by placing Bitty Sparkles on the hearts and stars. The red gingham paper is from the now discontinued Jubilee Paper Pack.


Thank you for joining us and I hope you are enjoying all of the great ideas, now please hop over to Maz's  blog and see what lovely project she has created. Please leave a comment as it encourages us to be more creative each month.

Saturday 19 September 2015

New Cards

I hope you are having a fun weekend doing what makes you happy.  One of things that relaxes me is sitting at my table creating, often the birds are in the birdbath splashing about but unfortunately not today. Here are a few of my recent cards, pink seems to be a popular colour with me at the moment so I thought a masculine card was needed to balance things out.

For this first card I wanted to try the watercolour paints for the first time, well all I can say is it didn't turn out too well. I guess more practice is needed. So instead  after stamping the roses I decided to sponge the colour on with a dauber and this worked so much better. I then fussy cut the roses and leaves and adhered them with the foam tape. I used Blush ink for the roses and Olive for the leaves and the sentiment. To finish off the card I added the pretty pink ribbon and a ribbon slide. The ribbon and heart shape ribbon slide come from my stash.


 I love this card and the intended recipient will be my niece's daughter who turns 7 later this month. I saw a similar card on Pinterest earlier this year and couldn't wait to copy it. I only just recently bought this stamp with the little girl and her puppy called Play Day Everyday Life D1515 and I finally had the chance to make it. The background stamping uses a Stamp of the Month from December 2013 called Special Care. Some Pink Washi Tape, Grey Bakers Twine and Clear Sparkles finishes off the card perfectly.


Finally here is my masculine card, I really like the Seaside Greeting set D1609. I stamped the sail boat in Black and the greeting in Cranberry ink. Then double matted the image with black and cranberry cardstock. To embellish I added the Black Sequins and the Black Twine.


The weather is perfect today,  so if you are enjoying the outdoors make the most of it. I hope you enjoy the rest of your weekend doing what makes you happy.

Tuesday 15 September 2015

National Stamping Month Blog Hop

Welcome to the National Stamping Month Blog Hop, if you arrived here from Vandra's Virtual CTMH Craftroom  you are in the right place, if you came upon this hop by chance why not follow along by clicking on the link at the end of this post.

For National Stamping Month, Close To My Heart have released 3 different stamp sets geared to every kind of papercrafter. Each stamp set is designed to fit with a specific type of papercrafting, whether that’s scrapbooking, cardmaking, or pocket scrapbooking. However, all the stamp sets coordinate with each other and can be used together to create dynamic artwork. These stamp sets also coordinate with shapes from the new Cricut® Artistry collection to help expand your artwork options even further. Remember, these stamp sets are available for this month only, so get your orders in for one stamp set or all three before these gorgeous stamps disappear! Each stamp set is $21.00.


I  had a lot of fun playing with these stamp sets, they are so versatile. I made some cards and had to stop at four but these stamps are so great the potential for all sorts of creations are endless. They would also make terrific layout titles as well.

This first card uses a stamp from the Hello Life Card Making set CC 1041, paper from the Blossom Collection and a few of the Aqua dots. The gorgeous cat is from the Friendly Pets B1481 stamp set. I cut a small circle in the blossom paper then tore the paper back to reveal the kitty. I saw a similar card on Pinterest and felt it suited the "Oh Hey" stamp really well.


This card was made using the Hello Life Scrapbooking set CC1040, the cameras were stamped using Slate ink and the sentiment was stamped with Glacier ink, unfortunately the Washi Taped used is no longer available. The sequins are from the Gold Assortment Pack


The third card also uses the Card Making stamp set, as you can see I used the Hello, Friend and Star stamps. I choose this lovely green dot paper from the Zoe Collection, the inks used were  Sorbet, Slate and Pear as I don't yet have the Sweet Leaf ink. I do like how the different stamps all go together really well.


 For my final card I used different stamps from all three sets. The gorgeous heart and the ink splotch stamps are from the Pocket Scrapbooking set CC1042. Here I used Lagoon, Slate and Blush inks  and a few of the Aqua Dots.


Thank you for joining us, to continue hop over to Lauren's  blog and see what special treat she has in store for you. I hope you enjoy hopping along and seeing all the great ideas this wonderful group of ladies have to share.

If you wish to buy any or all of these stamp set please check out my website 

Sunday 6 September 2015

Happy Father's Day

As I was driving to work on Friday morning, the morning radio announcers were talking about what advice their dad's had given them growing up, things like respect your mother, don't burn bridges, move on but leave doors open. It made me think about what advice my dad had given me over the years. As I thought about it I realised that the things I gleaned from dad were more lessons learned from how he lived his life.

He was never afraid of trying new things it didn't matter what age he was when something new spark his interest he would run with it. Through out his life he had many hobbies and interests, he would tackle these with much vigour and always wanted to excel at them. As a young man of 17 he went of the adventure of his life at that time. He sailed with a professional photographer from Nassau Bahamas to New York. He had grown up around boats and knew how to sail but this was something very different sailing some 1700 km of open ocean. The gentleman was Stanley Toogood who was renown for travelling throughout the Bahamas taking photographs.  

In his late 50s he and my mum decided to sell their hardware store and buy a block in the country with a view to establishing an avocado orchard. He wasn't one to start a project blindly, he did much research about growing avocados and got lots of advice from specialists.

He was a generous person, whether it with his time, knowledge or money. My eldest brother once told me that he thought dad was one of the smartest men he knew, not talking about book smart but about a man that had experienced a full life and had lots to share about that life. He definitely didn't know everything but he certainly knew a lot about many things.

I knew that he always wanted what was best for his family and would do what ever was in his power to achieve this. I love my dad very much and  wish I was able to tell him this now but as he passed away nearly four years ago it's not possible. So today and always make sure you tell your dad's how much you love them.

This is a photo of mum and dad on their wedding day in 1948, how young they both were at that time. They shared a long and wonderful life together.

Tuesday 1 September 2015

September Stamp of the Month Hop

Hello and welcome to this month's Blog Hop. If you arrived here from  Maz's blog  you are in the right place, if you happened upon this hop by accident no worries just continue on by following the link at the end of the post.

This is a lovely stamp and I have had such fun creating with it. This is another stamp that has cricut images that you can cut out and then stamp. 


I have created a layout and a screen divider card. I came across a youtube video with instructions for the screen divider card and really wanted to try making one. The video was very easy to follow and you can find it here 


I used gypsy and white cardstock and the green dot paper from the Zoe Paper pack. The inks used are gypsy and canary. The Triangle Border Punch was used on the top edge of the card. To create the legs of the screen I used a punch that is from my stash from another company. The gypsy cardstock is cut at 5 1/2 " x 11" then scored at 2 3/4", 51/2" and 81/4". The white panels are cut at  4" x 2 1/4", these are then matted with the green dot paper. I have added a ribbon but this is not necessary. This style of card is great to display.

For my layout I used the individual flower and leaf stamps, first I cut out the images which are from the Artiste Cricut cartridge, then stamped the flowers with Pixie ink and the leaves with Pear ink. I love using the Bity Sparkles to add a little bling. I still have some of the Chantilly papers and this is what I used here. The shapes for the sentiments are cut from the Art Philosophy Cricut cartridge. The Pixie Extra Thick Twine and 2 of the Flamingo Dots completed the project.


To continue the hop pop over and see what lovely creation Britt  McDonald  has to share. Thank you for joining us. I am sure you are getting lots of great ideas to use in your own projects. We do appreciate  your comments especially if you see something you like.

Saturday 22 August 2015

Yay It's the Weekend!

I love surfing the web and checking out Pinterest and craft blogs for new ideas. There are so many very creative people out there who are willing to share freely their creations. Here are a few of my recent cards.

When I saw a similar card to this card online I really wanted to try and replicate it,and this is how it turned out.


It's my niece's daughter's first birthday soon and I made this cute card for her. I love this stamp set with all the cute animals.


A friend was unwell a few weeks ago and I hoped to cheer her up with this Get Well Soon card. I received a lovely note from her telling me when she received this card in the mail it really brightened her day.


Have a great weekend and happy crafting.

Wednesday 19 August 2015

Close To My Heart Zoe Blog Hop

Welcome to our "Zoe" blog hop, if you arrived here from Shaunna's blog  you are in the right place, it's a pleasure to have you stop by. Zoe is one of the new products in the 2015/16 Annul Inspirations Catalogue which will be available for early purchase this month. The new catalogue will be released in September.


I have used the Zoe Workshop on the Go G1096 for my projects. The papers, stamps, and compliments are beautiful and it is available for early purchase this month. There are lots of great stamps in this set and I looked forward to using them. I decorated one of the Display Trays Z1570, inspiration for this project came from the CTMH Make It From the Heart site. I also used the Seaside Greetings stamp set D1609 and Treasured Friendship set C1594 as they complimented these photos  perfectly. The Glacier Extra Thick Twine Z3039 was used to make the fishing net in the bottom right corner.


I have also made two cards using the Zoe papers and the inks recommended for this set. This first one was a lot of fun to do, creating a scene was easier than I thought. I love all of the papers in this set, they are so colourful. Various stamp sets were used to make this card.


This card is a really easy one, the circles are cut using the cricut and the Happy Birthday stamp is from the Happy to be Friends stamp set C1605. The little flowers are made with punch which I have had for a number of years, and the Bitty Sparkles Z1263 look so pretty.                                  


To continue this hop click here to go to Maz's Inky Fingers, I am sure she has a fantastic creation to share.

Monday 17 August 2015

My Weekend Visitor


 My niece's daughter Lucy spent a weekend with me a few weeks ago and we had a great time together. On the Saturday we baked cookies and on the Sunday we did some gardening. It's such a pleasure having her stay with me, she is happy playing on her own for awhile and always tidied up afterwards. I have a toy box with a variety of toys, for the kids when they come. The toy box has dolls, cars, puzzles and even a doctor's bag with a stethescope and reflex hammer. We planted a selection of flower seedlings in my old wheelbarrow and I can't wait until they are all flowering I am sure it will look really nice.


Our chocolate cookies not long out of the oven, they were very yummy. We went to visit my mum Saturday afternoon and took some of our cookies for afternoon tea.


Lucy showing off  our wheelbarrow flower project.