Friday, 15 March 2019

So Much Happy Blog Hop

Hello and welcome to the CTMH Australasian So Much Happy blog hop if you arrived here from Maz Wood's blog you are in the right place, if you arrived here by chance click on the link at the end of this post to go to the next blog.


Close To My Heart never fails, their products are always fantastic and the So Much Happy collection is no exception. I really like how the paper packs have the coordinating cardstock as well as the printed papers and decorative elements.


My plan for this hop was for my projects to be easy and simple to complete. I think I have achieved that.

Giving handmade cards is so special, I know from experiences the receivers love them.

This card really is quite a simple one but I think it is really lovely. I have taken inspiration from the paper with the white daisies. All you need is a few small pieces of paper and the white daisy and leaves, so easy! The daisy was cut using the Flower Market Cricut cartridge. Add the butterfly and a sentiment and the card is finished.


For this layout I have used three of the papers, two zip strips, some of the decorative stickers and a few cute photos. Easy peasy, no fancy cutting just straight edges and simple decorations.


This treat bag is made with a piece of paper that is 8" x 5" and adhered at the back with a strong adhesive. Decorate as desired.

The bag will hold lots of different things. In this photo it has two of the 1/4" washi tapes and one that is 1/2". You can also add a packet of the gems or one of the narrow rolls of ribbon. I am sure you will come up with lots of your own ideas. I thought this would be a great way to use up all of our extra papers and these bags will be great for give aways at our workshops and retreats.


Once the edges are glued together score the bottom and fold as shown. Trim the two ends on an angle and also trim the underside edge before you glue the end down. I used a circle punch to allow for easy access to what you put in the bag. 


Thanks for stopping by, I hope you have seen something you like. To continue the hop go to Vandra's CTMH Craft room  and see what wonderful project she has created.  Please take a moment and leave a comment they are very much appreciated.

Friday, 1 March 2019

March Stamp of the Month "This Happened"

Welcome to the CTMH Australasian blog hop if you arrived here from Shaunna's Passionate About Pages you are in the right place. If you arrived here by chance you can continue the hop by clicking on the link at the end of this post.


This month's stamp set is all about things to remember, it is perfect for journaling on your layouts or some of the stamps can be used for cards. These stamps are so versatile and I know I will use them lots.


For this card I used the "What a Day" stamp, the T O from the today stamp and the celebrate thin cut to create my sentiment. I have also used the lovely Heart Happy collection that was a special release last month, I love everything in this collection. To make the celebrate thin cut more prominent I cut it twice and then glued it together.


I have used a few different stamps and again I have used the Heart Happy collection for this layout. After stamping the Take Note stamp I have cut it and added the small bits of Zip Strips because I  didn't need the words but I liked the look of the flags. Sometimes it isn't necessary to journal about what's happening in the photos but rather about what really matters!


Thanks again for stopping by, to continue the hop go to Lauren Moore and see her wonderful project. All comments are gratefully received so please take a moment and leave a comment. 
Happy Crafting!

Saturday, 23 February 2019

Large Flowers and Celebrating Birthdays

I did a workshop with my niece Laura to learn how to make these large flowers, they are so beautiful and really quite easy to make. These are the ones I made at Laura's workshop.


 My friends Karen , Colleen and I got together so I could show them how to make these lovely flowers. We have so much fun crafting together.


This is my completed project, I've decorated a reed swag with the flowers and ribbon. I choose a number of different CTMH patterned and plain red papers and added some leaves. It hangs on the cupboard door in my entrance way.


It was Karen's birthday a few days later so we celebrated her birthday as well. Here is a layout I created with the I Heart Us paper collection and compliments. I love how it turned out.


I hope you have a wonderful weekend  and get an opportunity to do some crafting.


Friday, 15 February 2019

I Heart Us Blog Hop

Welcome to the the CTMH Australasian  blog hop, if you arrived here from Shaunna's Passionate About Pages you are in the right place. If you arrived here by chance I hope you see something you like. To continue the hop click on the link at the end of this post.


This is a wonderful collection, the colours and patterns of the papers are beautiful and the stickers are so gorgeous.There are two stamps sets that coordinate with this collection, I have only used one.
   

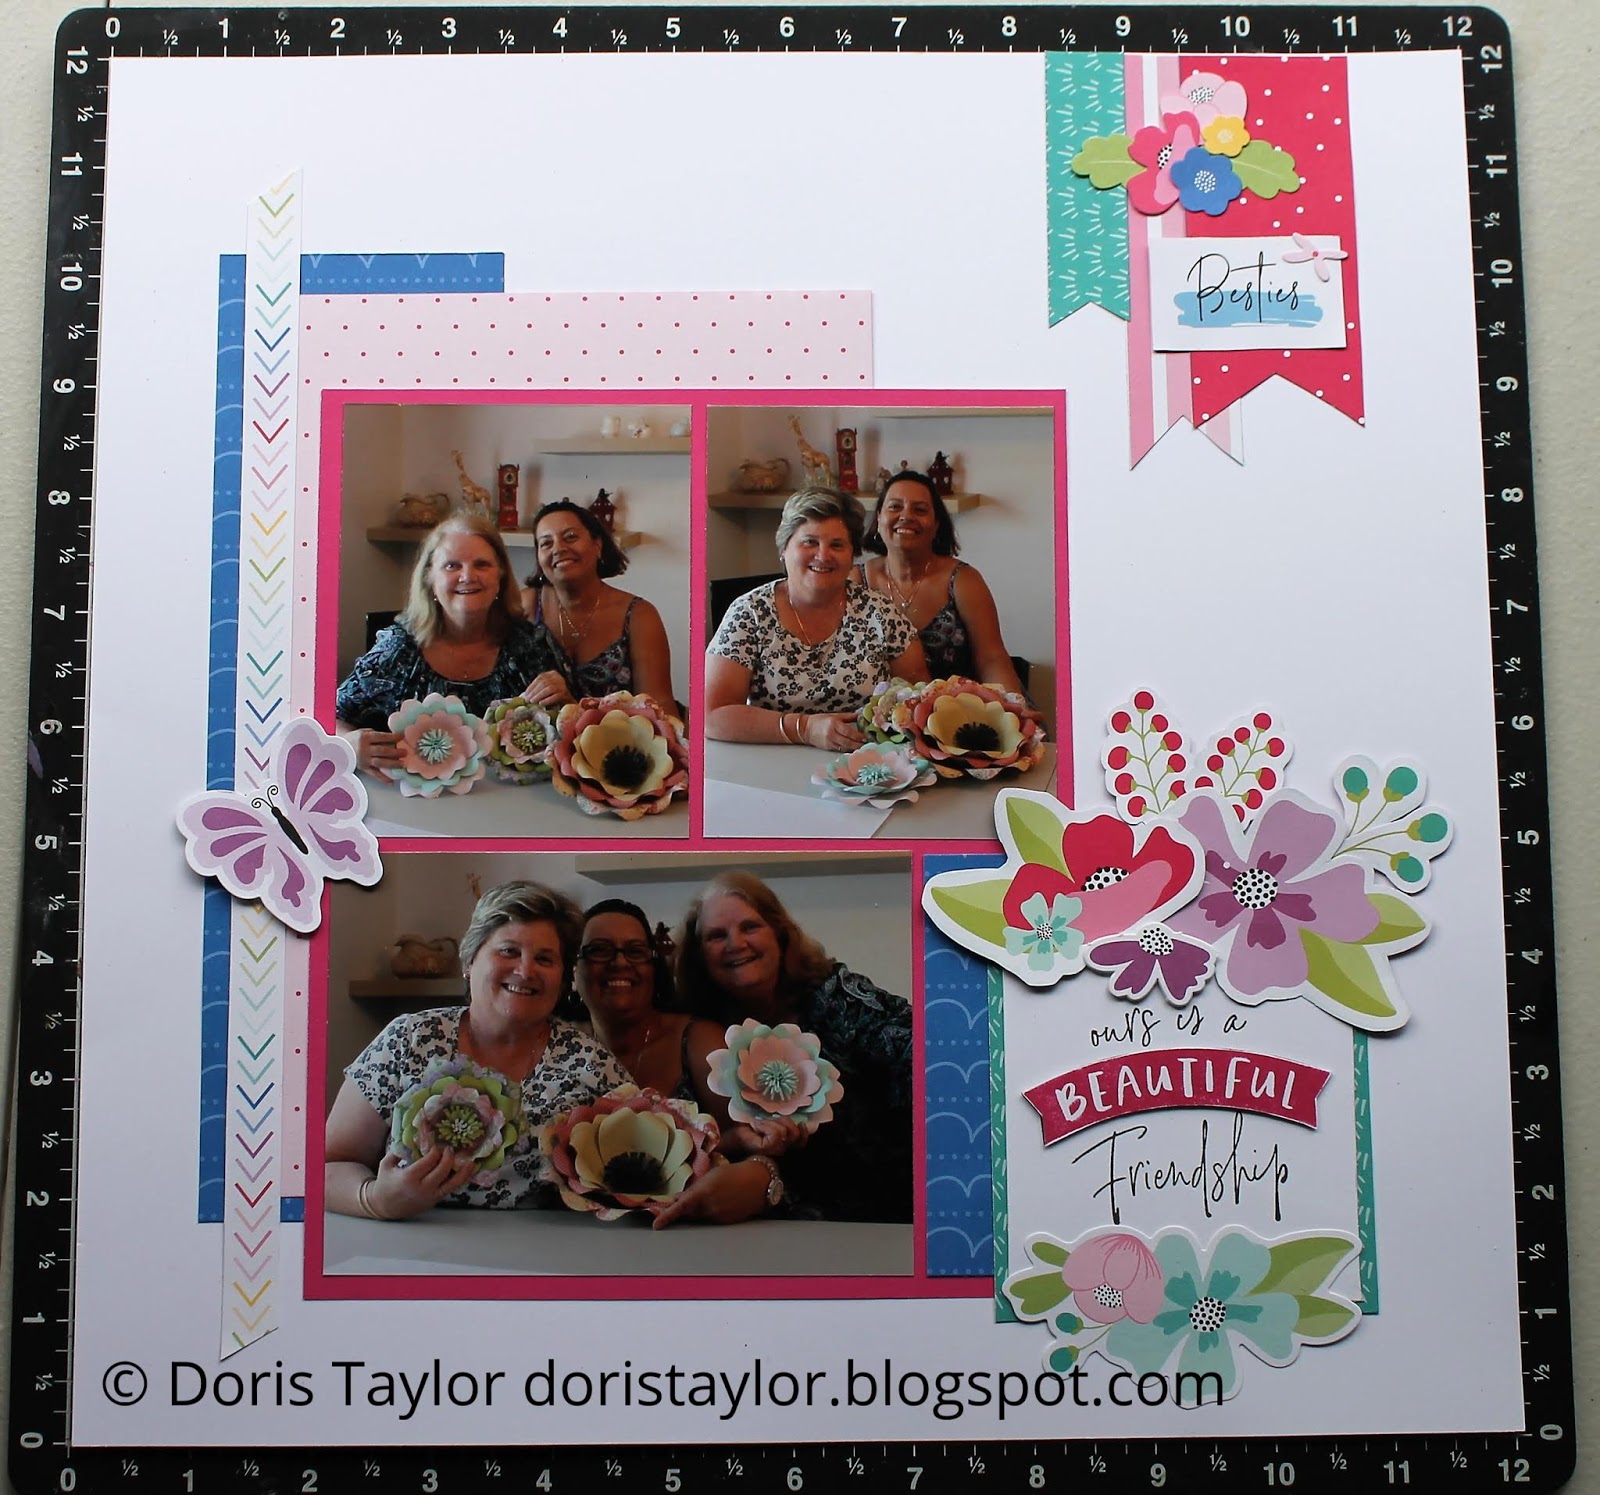
For this layout I have used some of the papers, a selection of the paper flowers, stickers and one of the stamps from the I heart Us Cardmaking kit. I love this sentiment "ours is a beautiful  friendship" These two friends really are my besties


I keep trying to improve my water colour painting and I am rather happy with this effort. I stamped the flowers and leaves with Pebble ink. I wanted the background to be a softer colour so I decided to use some vellum paper on top of the blue and I liked the look of the striped one but the gold stripe was too bright so I turned it over and much preferred this look. I love the pink pearls.


Blue and white is one of my favourite colour combinations and I especially like the Carolina Blue in our range. I decided to use this cardstock and heat emboss with the white embossing powder and the flower stamp. I have also used the new Swiss Dot Embossing Folder, the hello thin cut, some white ribbon and a little bling.


Thanks again for stopping by to continue the hop go to Vandra's Virtual Craftroom and see what wonderful project she has to share. Your comments are always appreciated so please take a moment and leave a comment.

Friday, 1 February 2019

February Stamp of the Month Blog Hop

Welcome to the  February Stamp of the Month blog hop, if you arrived here from Shaunna's Passionate About Pages you are in the right place. If you arrived here by chance I hope you see something you like. You can see more of this stamp set by clicking on the link at the end of this post.


This wonderful stamp really does make my heart happy! It is large enough to use it as a title for scrapbooking and if you are into making bigger cards such as 6x6 or larger this would be perfect. The lovely flower and leaf stamps will be great for lots of smaller projects.


I couldn't wait to colour the flowers in this stamp, it truly is a beautiful design. The Shin Han markers matched the colours in this paper pack beautifully. I have used the Oh What Fun papers and some of the compliment stickers.


I decided to stamp the banner in Lagoon ink and then very carefully stamp the "You Make My" on the top. I fussy cut it and adhered it with Foam Tape, I really like how it looks when it is raised a bit..


This card uses a number of the single flowers and leaves, I coloued and fussy cut them. I wanted to create the look of a wreath so I cut 3 hearts using the largest heart Thin Cut and added the flowers and leaves, a few gems and a sentiment and the card is finished. The Get Well Soon is from the January Stamp of the Month. 


I am so happy you stopped by, to continue the hop go to Vandra's CTMH Craftroom, I am sure she will have something wonderful to share. Please take a moment and leave a comment, we all appreciate them.

Tuesday, 15 January 2019

Something Fierce Blog Hop

Welcome to our blog hop if you arrived here from Creating with Kara's blog you are in the right place. If you arrived here by chance I hope you see something you like and you can continue the hop by clicking on the link at the end of this post.


The Something Fierce collection is so much fun, at first glance it looks like you would mostly use it for kids projects but the papers are so pretty you can use it for all sorts of projects.


I decided to use one of the PML cards to make a birthday card, these really make quick and easy cards. To make the dinosaur stand out more I used the same dinosaur sticker as on the card, I adhered it with the 3D Foam Tape. The sticker border adds another pop of blue colour. Any child would love to receive this fun card, we know everyone loves a skating dinosaur. 


For my layout I have used three of the papers and some of the Zip strips and for decoration I have added a number of different sized thin cut hearts. I stamped Mothers Day in versa mark ink on the blue paper, then clear embossed it and fussy cut the letters.There is a great special on Alphabet stamps this month.


One of my goals for 2019 is to use up my stash of CTMH discontinued products, I really do have way to much stuff. So for this project I have used the black and white paper and created an envelope to hold a gift. The envelope is 4.5" x 4.5", it is large enough to hold all sorts of treats.

To decorate I have used a number of different products. These beautiful ribbon roses were a cream colour but using the inks they can be dyed any colour, the leaves were some of the first items I bought when I became a CTMH consultant. I have layered the white cotton ribbon which comes in the kit on top of the peacock ribbon and this acts like a belly band to keep the envelope closed. A small gem flourish is a lovely decoration. All that was needed was a sentiment.


Thanks again for stopping by to continue, hop along to Shaunna's Passionate About Pages, and see what great project she has to share.

Please take a moment and leave a comment we all really appreciate them.

Tuesday, 1 January 2019

January Stamp of the Month "Card Captions"

Welcome to our January Stamp of the Month blog hop, if you arrived here from Nell Ward you are in the right place. If you arrived here by chance I hope you see something you like and to continue the hop click on the link at the end of this post.


Card Captions is a wonderful stamp set it has 26 images both sentiments and icons. This set has just about any sentiment that you could need. I can see myself using this set again and again.


This first card uses the lovely thinking of you sentiment I love the bold fancy lettering. All of the stamps that I have used stamp beautifully with good coverage no need for extra pressure.

Some mistakes can become features, after stamping this bunch of flowers I decided to colour with the Shin Han markers and I went outside the line big time on the pink flower. I didn't want to start over so I decided to fussy cut the image, then mounted it on a stitched circle using 3D foam tape. I love this embossing folder which I have had it in my stash of goodies for some time now. I really like to add butterfly punches whenever I use a flower stamp, I just think they really go together.


I wanted to make  a birthday card using a cupcake stamp but decided I wanted it to be a more adult version so I chose black, white and gold for my colours. I decided on this cupcake stamp because it also has the Thin Cut to match which made making the cupcake in two pieces so much easier. It's called Sweet Birthday Z3374 and it is essential for baking and birthdays. As you can see I only used the candle stamp not the cupcake.

To make the cupcake I first cut the whole cupcake in the gold foil paper than just the top in the white with gold dots paper.  I used the gold embossing powder for the Birthday sentiment and the candle. A few gold gems and some black ribbon added the finishing touch. I scored lines on the cupcake to give it some dimension.

You can see my stamping of the sentiment is not quite straight that's because I stamped the Happy and Birthday separately by placing the just the part that I wanted on the block and folding the extra bit along the back of the block. I have cut my stamps before when I feel it's necessary but if I can get away without having to cut the stamp I will. In this instance it not being straight didn't bother me.


I love this Birthday Box that I have made for special little girl's birthday in February. It's called an explosion box, I decided to make it 4" square so it could hold a few goodies. I really like the papers in the Oh What Fun collection that was showcased last month and knew I would be using it for projects other than Christmas. This lovely pink heart ribbon is no longer available.


Instead of having all four flaps fall I choose to adhere two together so once I put the extra presents in, it would be easy to place the lid on the box. I have used a few of the different papers and Zip Strips from this collection. I have made two small boxes and what is know as a sour cream container to hold some special presents.


 Here are a few close ups of the inside of the box and the stamped sentiments, I used five of the different sentiments in this project. I hope Lucy will like her special gift.


Thanks again for stopping by to continue the hop go and see what Kylie McLoughlin at Creating with Kylie has to share. I am sure it will be something wonderful. Please take a moment and leave a comment, it does help to motivate us to be more creative.

January 1st is also the release of the new Seasonal Expressions catalogue, and boy you will love everything in this catalogue. The cover has a photo of the founder of Close To My Heart Janette Lynton as this year marks 35 years that she has been in the crafting industry.  This company goes from strength to strength each year with fabulous new products and opportunities.

Saturday, 15 December 2018

Oh What Fun Blog Hop

Welcome to our Oh What Fun blog hop, if you arrived here from Shaunna's Passionate About Pages  you are in the right place. If you arrived here by chance it's nice to see you, to continue the hop click on the link at the end of this post.


I must admit I love the traditional colours of red and green for Christmas and can't quite get my head around to using pinks and blues. The Oh What Fun collection has these beautiful  pinks, blues and greens which I can see using for lots of projects. I do love the colours in this collection but just not for Christmas. The compliments pack has some really cute elements.


The beautiful pinks and blues did work really well with these photos of a scrapbooking event. My niece Laura Beacham is also a CTMH consultant and she made this fantastic flower frame for a photo opportunity at the workshop. I decide to replicate the look of the frame as decoration for my layout. I must give credit to Jennifer Smith createbyjennifer.blogspot.ca  I used one of her layouts as inspiration.


I have been wanting to have a go at using the Textured Paste since it was released and now was as good a time as any, so I created this mixed media canvas. I used the small pink dot paper as the background and then added smaller pieces of the large pink dot paper. I sponged white ink over the canvas and then stamped the butterflies in black Momento ink.


Now was the time to try the Textured Paste, using a script stencil I added the Textured Paste with one of the Palette Knives to a few spots on the canvas. Once the Textures Paste had dried I added some pink spray ink that I have in my stash. The butterfly was stamped on the same paper that I used for the title then fussy cut it. I cut another butterfly in the glacier cardstock and added the stamped butterfly on top with 3d foam. I used four different patterned papers to make the roses. The roses, pearls and burlap twine completes this project.If you haven't tried the Textured Paste yet I encourage you to try it, it was a lot of fun.

 I couldn't be bothered get my cricut out so I hand cut the rolled roses. It really is very easy to make these. Cut a circle out of your papers then cut the circle into a spiral.


Roll it up and using glue dots adhere it to small circle that is at the end of the spiral.
To finish off the roses I inked the edges with Raspberry ink and added a pink pearl.


Thank you very much for stopping by to continue the hop go to Lauren Moore"s blog and see what she has to share. Please take a moment and leave a comment, it is very much appreciated.